ConnectLingua + Nice
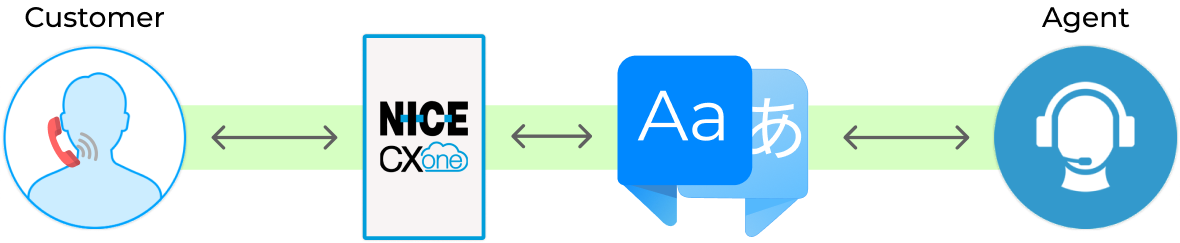
Start reaching new customers
01
Sign up on ConnectLingua.ai
02
Import Configuration into NICE
03
Start using Translation
Prerequisites
a. NiCE CXOne Sandbox
1. Point of Contact (Voice Calling)
2. Inbound Skill (with your test agent)
3. User Accounts for testing
*) 1 User account with Agent access
*) 1 User account with API access
b. Download the scripts from scripts.zip and extract scripts into a folder. Save these scripts for later.
Please follow below steps to test translation.
Create an account
Login
1) Go to nice.connectlingua.ai
2) Click on Start your Free Trial
3) Create an account
4) Verify your email
Import script into your NICE Sandbox
1) Open your CXOne Studio
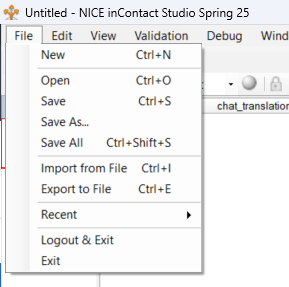
2) Click on File ➡️ Import from file or press Ctrl+I
3) Navigate to your downloaded scripts folder and open MainScript
4) Save the file into your desired folder or the root directory (DO NOT CHANGE THE NAME OF THE SCRIPT)
5) Click on File ➡️ Import from file or press Ctrl+I and import the SpawnedScript from your downloaded scripts location (SAVE FILE IN THE SAME FOLDER IN WHICH YOU HAVE SAVED THE MAIN SCRIPT – DO NOT CHANGE THE NAME OF THE SCRIPT)
Update the newly imported script
Updated the annotated script actions. See order below:
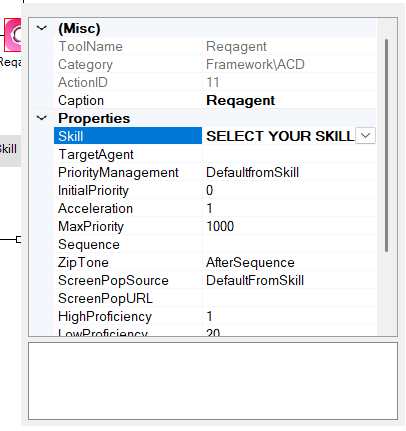
1) Update REQAGENT in MAIN script
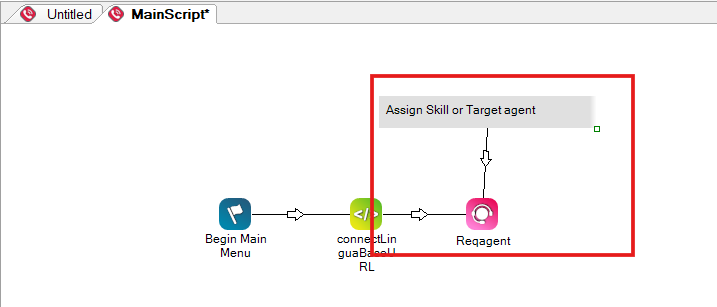
2) Set your desired skill
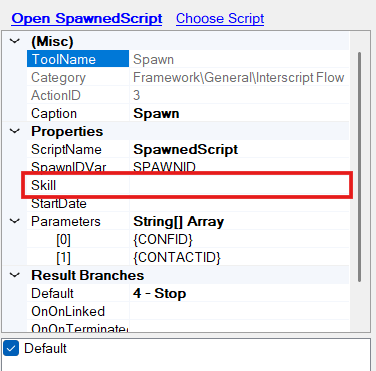
3) Update SPAWN action in MAIN script
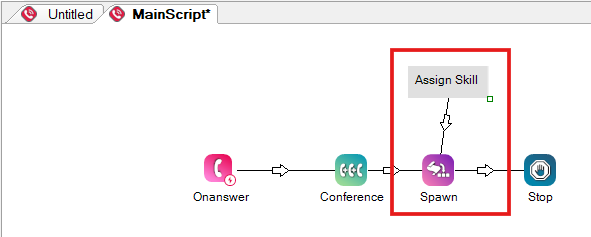
4) Set the same skill in Spawn action
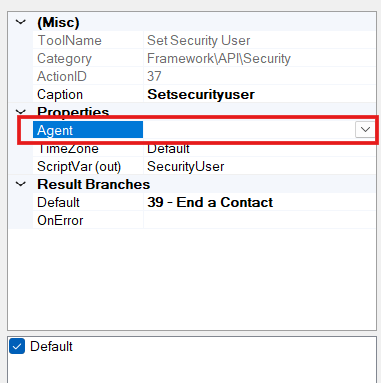
5) Update SECURITY PROFILE in MAIN script
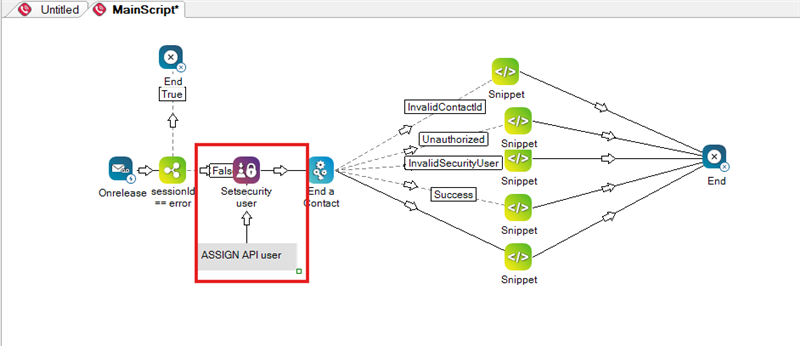
6) Set the agent to API access user account
7) Assign a POC (point of contact) under ACD ➡️ Points of Contact on NICE to the MainScript
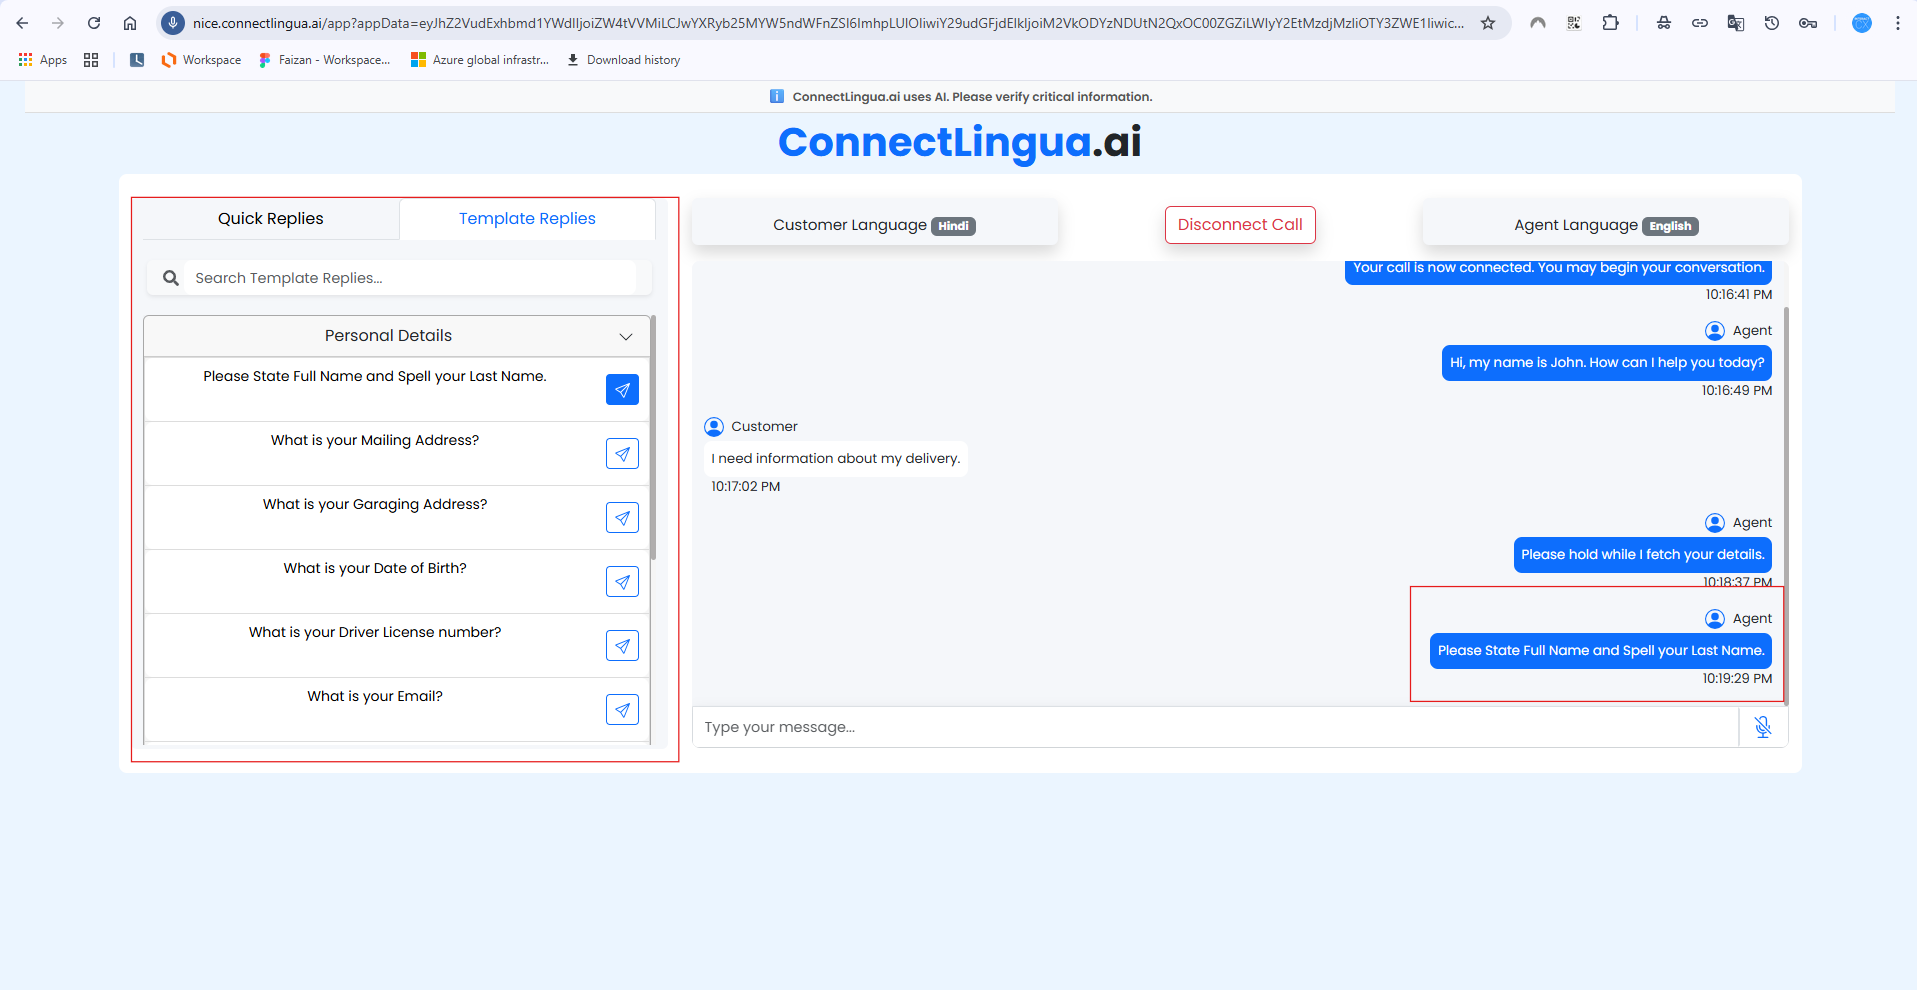
Test your translation
1) Sign into your nice.connectlingua.ai account
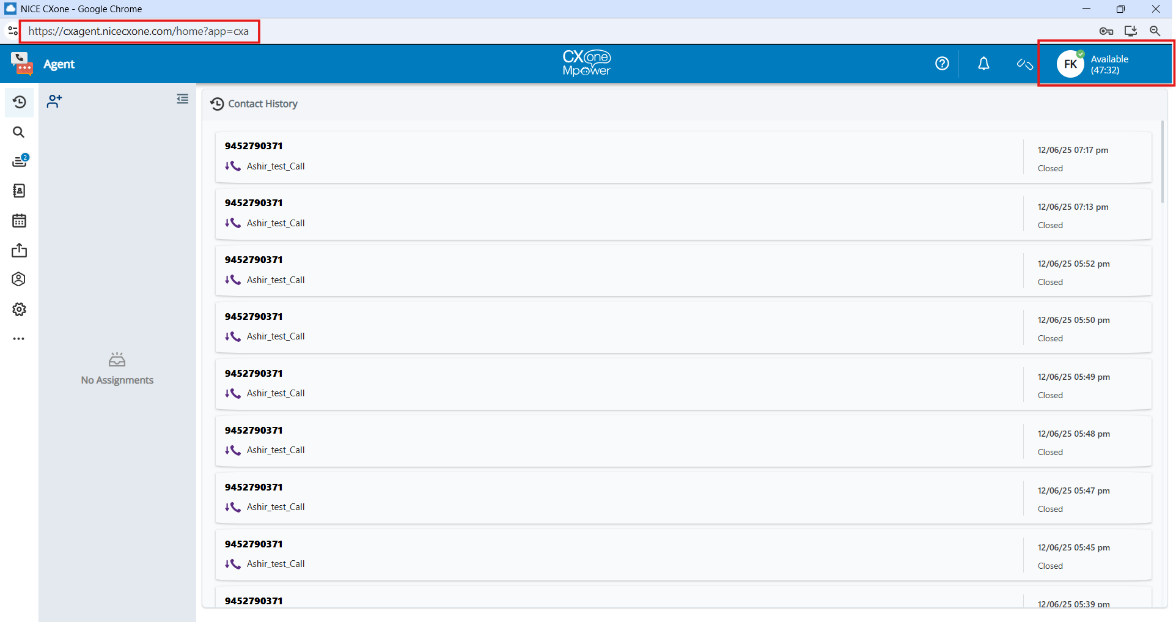
2) Open CXAgent and set your state as available
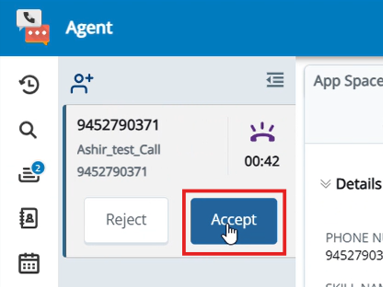
3) Call the POC you have routed to the MainScript
4) Accept the incoming call
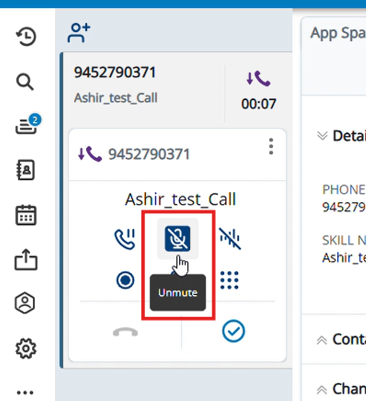
5) Mute your microphone
6) Connectlingua.ai UI will automatically pop in your browser in a separate tab

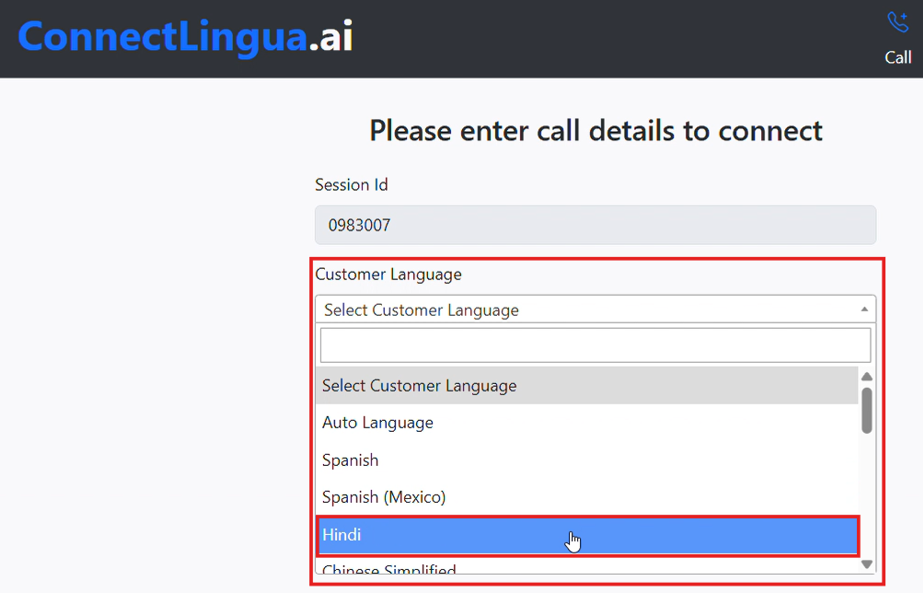
7) Select the caller language using the dropdown or set as Auto Language to detect language automatically
8) Press on Connect Call
9) Unmute microphone to start using ConnectLingua.ai mic
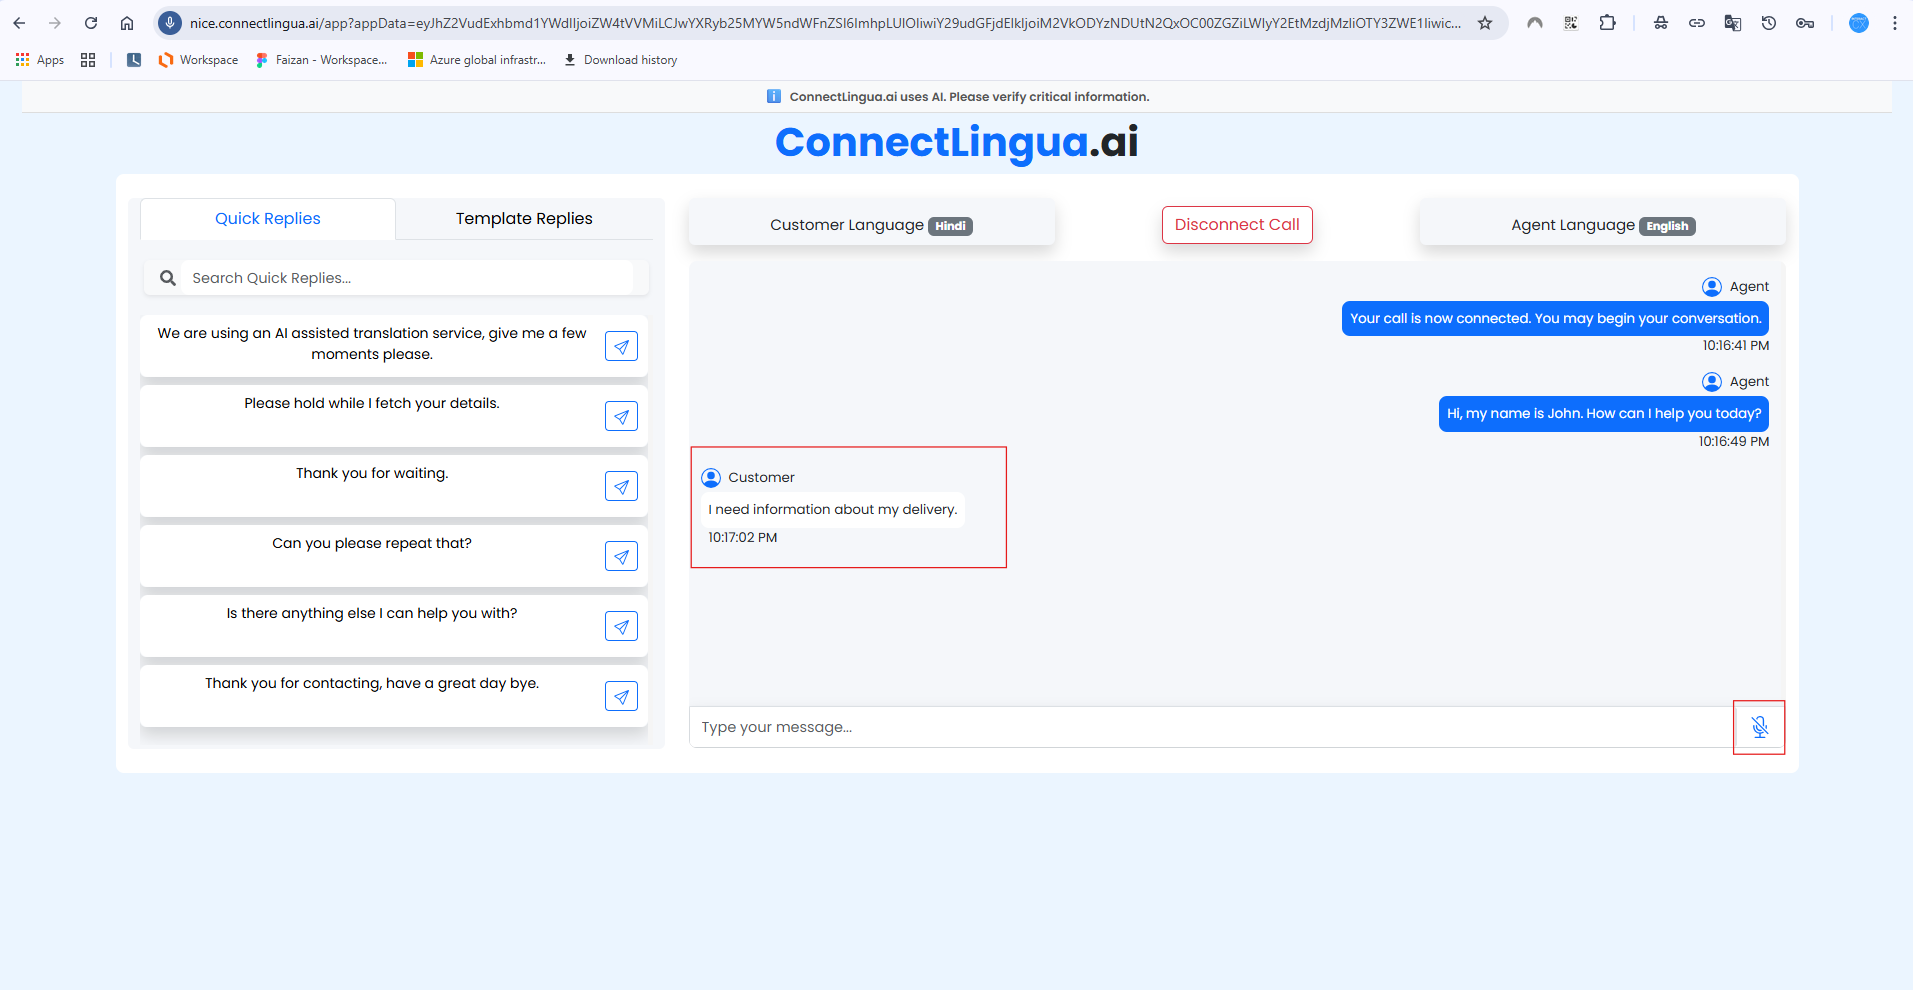
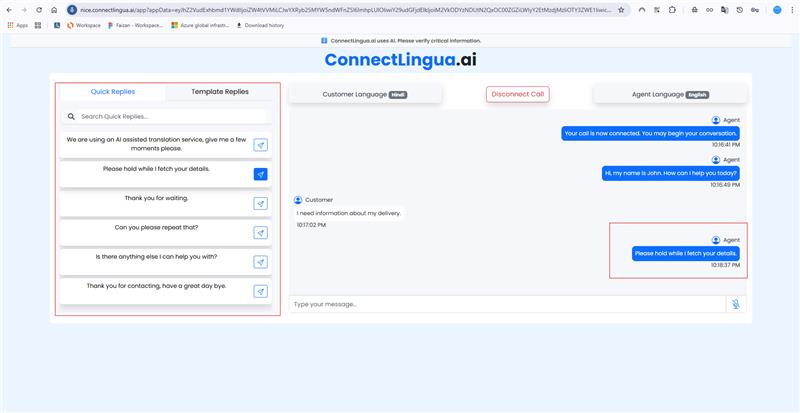
10) You can use quick replies in this section for fast canned response
11) You can use template replies in this section for canned responses that follow a customizable script